Guitar build nombre deux


William MG
Full Access
Joined: 03/08/19
Posts: 1,643
William MG
Full Access
Joined: 03/08/19
Posts: 1,643
06/15/2019 6:21 pm

So this has a bit of explaining.

A short time ago I posted that I was doing a guitar build and invited members to join me in the fun. The goal was to learn through the experience. Not so much about woodworking but more about the electronics. There is a lot of complexity in these little pots and pickups I am learning.

So off to the internet I trodded and when I arrived I placed an order for a pretty nice looking Les Paul kit. Eager to get started I told the sales bot to send me the kit next day delivery.

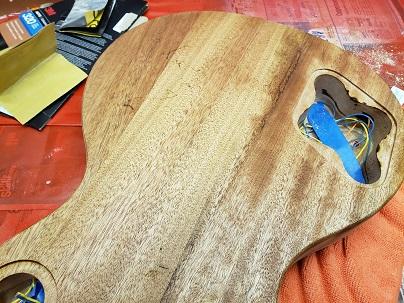
The next day the kit arrived but it did not look quite so promising in hand as it had looked at the internet store. There were many issues with the body and neck. We're talking dings and dents. Hmmm, this kit had cost me $299 plus 15% tax - I am not including the shipping cost here as I chose next day shipping - and I was not at all happy. So at that point I felt this is too much money for a piece of kit with so many quality issues and decided I would contact the vendor to discuss a return.

The vendor was very cooperative, offering either an exchange or a refund. He would pay the shipping.

But either solution had its problems. There was no guarantee the replacement would be any better. Getting a refund still left me in the position of needing a guitar to experiment with. I thought of buying used and starting there, but there is so much work involved in stripping finish I didn't want to do that.

So after considering my goal and my options, I decided to work with what I had provided all the bits fit together well. They did. So the build is on.

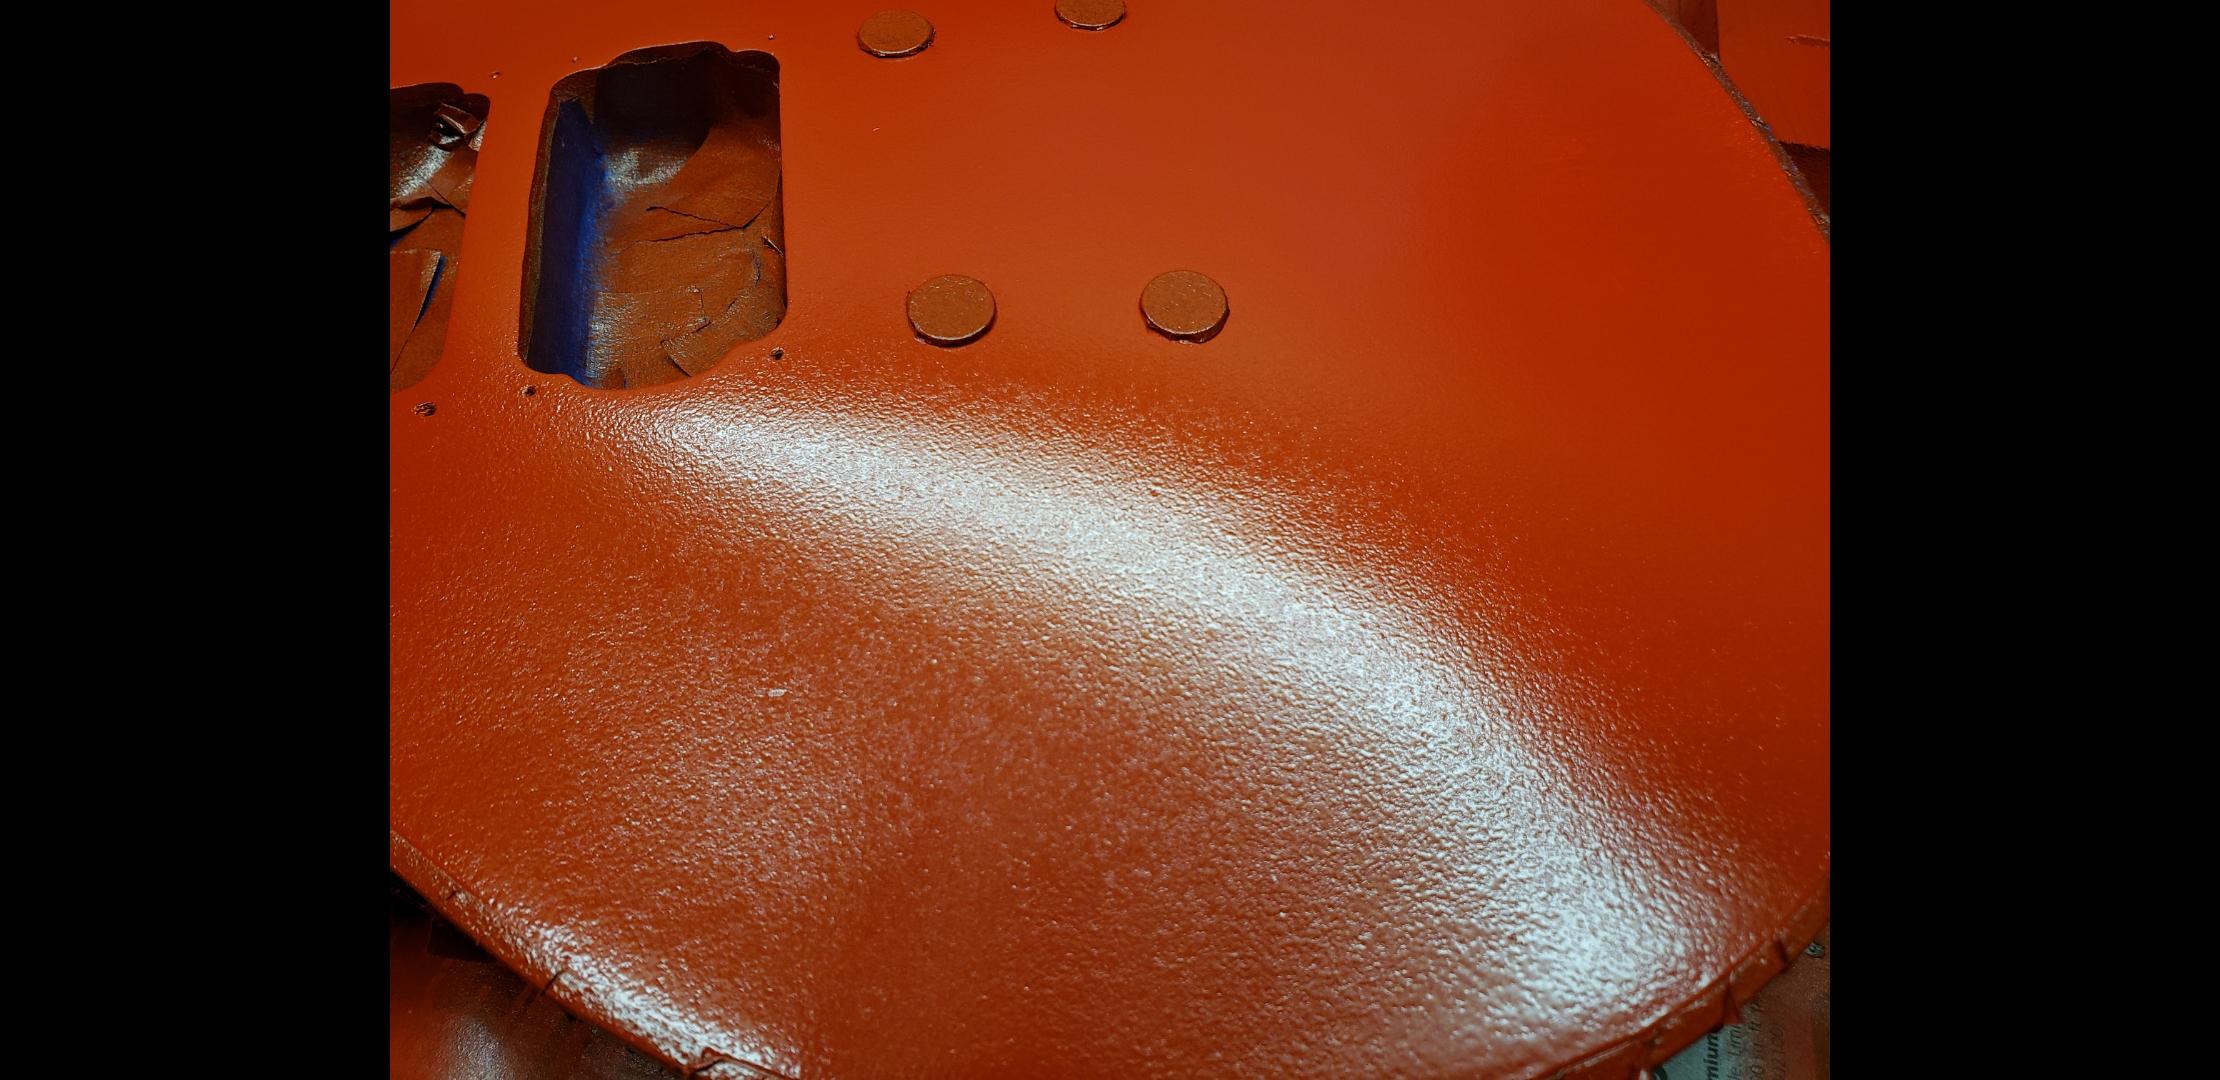
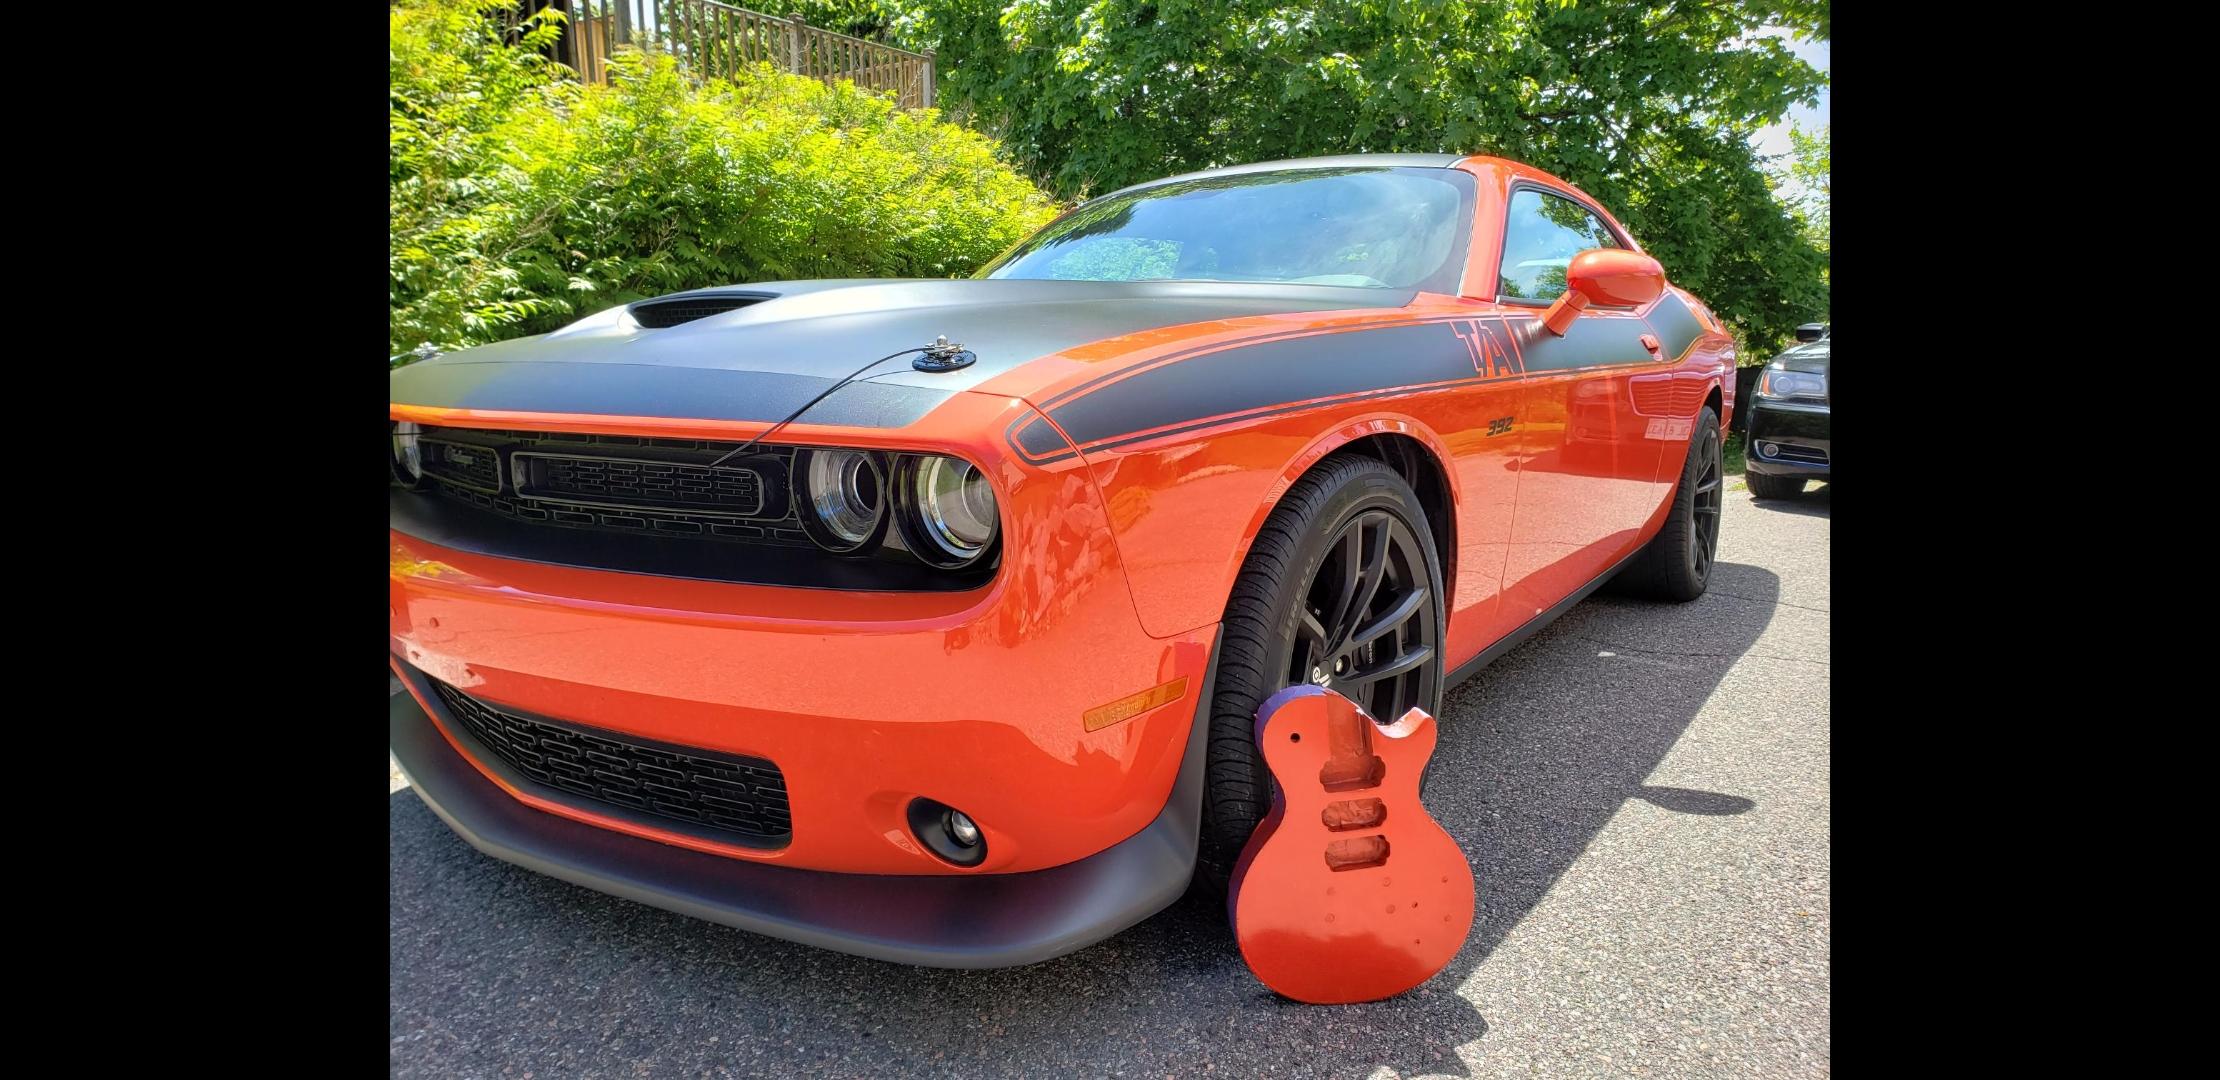
One question with this project was the color I would go with. I had many ideas but what I decided on was what you see in the pic. The car is very special to me as this project is. I plan to finish the sides, back and neck in matte black to match the car. The orange color itself is Mopar GoMango.

In this build I dont plan to use the kits wiring plan. I have other ideas in mind that I will discuss at a later time. This message is long enough.

Wish me luck!


This year the diet is definitely gonna stick!

# 1
manXcat
Registered User
Joined: 02/17/18
Posts: 1,476
manXcat
Registered User
Joined: 02/17/18
Posts: 1,476
06/15/2019 9:16 pm

Good Luck!


# 2
William MG
Full Access
Joined: 03/08/19
Posts: 1,643
William MG
Full Access
Joined: 03/08/19
Posts: 1,643
06/15/2019 9:34 pm

Thank you sir!


This year the diet is definitely gonna stick!

# 3
William MG
Full Access
Joined: 03/08/19
Posts: 1,643
William MG
Full Access
Joined: 03/08/19
Posts: 1,643
06/16/2019 8:40 pm

Paint.

I am finding that achieving a great looking finish isn't easy. Even though I was careful there are many blemishes that appear in the surface. I will have to look for a way to work these out. In the meantime I am moving forward. I figure as long as I don't clear coat, I should be able to make corrections.


This year the diet is definitely gonna stick!

# 4
William MG
Full Access
Joined: 03/08/19
Posts: 1,643
William MG
Full Access
Joined: 03/08/19
Posts: 1,643
06/16/2019 9:00 pm

Paint:

This is the type of finish I would like to achieve but truth be told I would need to make a bigger commitment to this project than I am willing to make.

This is my Epi LP Standard. It has that glassy gloss manufacturers are able to achieve that makes our guitars appear to be made of hard sugar candy. It feels like glass in the hands. I adore this guitar.


This year the diet is definitely gonna stick!

# 5
manXcat
Registered User
Joined: 02/17/18
Posts: 1,476
manXcat
Registered User
Joined: 02/17/18
Posts: 1,476
06/16/2019 10:58 pm
Originally Posted by: William MGI am finding that achieving a great looking finish isn't easy.

That's "orange peel" effect in the first photo William MG. You'll have to cut it back to smooth (or strip it back) and respray before you apply the finish colour coat or clear sealing/protective coat - unless that effect is what you're wanting?

[br]Always spray any wood with a matt wood undercoat first. Wood undercoats are usually coloured neutral mid grey for darker finish colours, or white for lighter. Depends on the finished shade you want to effect as well. That will seal the wood pores and show up any unseen grooves, marks, dents etc that any initial fill and sanding hasn't rendered uniform. It also provides a bonding layer and consistent opaque shade layer for the following colour coats.

Are you using spray cans or an airbrush/spray gun with compressor?

What type of paint are you using? Acrylic, enamel, polyurethane or two pack?

Amazingly, a pretty decent job can be achieved using [u]quality[/u] pressure pack cans these days. I like using polyurethanes if using pressure packs, but poly is [u]very[/u] unforgiving to spray, and quality poly is HAF to sand back if it goes pear shaped. e.g. orange peel.

[br]Done 'quite a lot' of spray painting in my time. Made the mistakes. Learnt the lessons. Everything from plastic display & control-line & R/C flying models, through furniture, doors rooms. Even spray painted two motorbikes I restored from tired and worn to as new once....they turned out great. See the Desmo in the image below. Bolstered by that success, some years later I tried spraying a (whole) car. Haha => major fail....also smart enough to concede I wasn't up to that job. Sent it to the pros to do it in a spray booth. Lubbly jubbly, but $$ouch$$!

Best of luck.


# 6
William MG
Full Access
Joined: 03/08/19
Posts: 1,643
William MG
Full Access
Joined: 03/08/19
Posts: 1,643
06/16/2019 11:40 pm

Glad you chimed in manX. I need to fix this. Am using PPG automotive paint mixed in a spray can to the color spec of the car. Aside from that I can't tell you much. I know the dealer supplies autobody shops with paint and that once I am ready for the clearcoat they will provide me with the correct item.


This year the diet is definitely gonna stick!

# 7
manXcat
Registered User
Joined: 02/17/18
Posts: 1,476
manXcat
Registered User
Joined: 02/17/18
Posts: 1,476
06/16/2019 11:54 pm

Typical batch electrostatic spray painting of Blue Ice Metallic Manson Classic TC bodies in the Cort factory in Indonesia.


# 8
manXcat
Registered User
Joined: 02/17/18
Posts: 1,476
manXcat
Registered User
Joined: 02/17/18
Posts: 1,476
06/17/2019 12:01 am

What they look like finished. The finish coat really does look just like this on mine. The lighting in this photo (deliberately) accenuates the blue. In natural daylight, the "ice metallic" aspect stands out, and the "blue" hue isn't as prominent.

A standard to aim for perhaps? Hand painting and finishing, I could achieve something very close, but as I said, it's a LOT of work to achieve a standard of finish like this by hand.


# 9
JeffS65
Registered User
Joined: 10/07/08
Posts: 1,602
JeffS65
Registered User
Joined: 10/07/08
Posts: 1,602
06/18/2019 5:25 pm

Here's a great article fromPremier Guitar in finishing a guitar. In addition to the info from the others, it's really all about snading and buffing. You want plenty of coats of paint and sanding and buffing. Similar to a car, really. Also, You should be acquinted with StewMac, it is the place for supplies (if you don't already know).


# 10
William MG
Full Access
Joined: 03/08/19
Posts: 1,643
William MG
Full Access
Joined: 03/08/19
Posts: 1,643
06/18/2019 8:45 pm

Well I certainly would be happy with the finish on that Strat Jeff. Thanks for the post.

I think at some point a redo is in order. I am moving forward so I can start messing with the electronics.

From what I have gathered off the internet these pickup may be a bit on the hot side?


This year the diet is definitely gonna stick!

# 11
manXcat
Registered User
Joined: 02/17/18
Posts: 1,476
manXcat
Registered User
Joined: 02/17/18
Posts: 1,476
06/28/2019 4:38 am

Do you know what winds they are Will? The image suggests a generic of Chinese manufactured origin as there are no model annotation labels on the underside nor stamped imprint on the baseplate. Nevertheless they could come from manufacturer using decent materials with QC. Wilkinson for instance has his branded PUPs manufactured by under licence in both Korea and China, model dependent.

9k and 10k is certainly hotter than the mean for vintage PAF humbuckers but not "HOT!" hot - Vintage PAF typically run around 7½k - 8½k from what I glean. The LAF (Les Paul PAF) alnico V Humbuckers in my CS Custom (neck and bridge) are a well matched positional specific pair, respectively 8.3k neck & 8.4k bridge, and the push-pull coil split function affects both concurrently.

For comparison the Seymour Duncan Custom 5 alnico V Trembuckers in my HSS Pacificas are circa 14k. However only the Trembucker is split, rendering it a good match with the singles when split emulating Strat SSS mode, and HAF with Trembucker only selected with both coils active.

But three of 'em, and in that big LP solid Mahogany body! It's gonna' be a beast!


# 12
William MG
Full Access
Joined: 03/08/19
Posts: 1,643
William MG
Full Access
Joined: 03/08/19
Posts: 1,643
06/28/2019 1:40 pm

Do you know what winds they are Will?

No, there are no indicators as to who the manufacture is. In terms of QC, they “seem” ok. Will have to wait and hear them. I plan to record some sound files using my Epi as a base and will do the neck, bridge comparison thing.

9k and 10k is certainly hotter than the mean for vintage PAF humbuckers but not "HOT!" hot - Vintage PAF typically run around 7½k - 8½k from what I glean.

I did a test on my Epiphone and they were in the 7.5 range. However, this was tested through the cable, so not sure if I would have seen a loss. Again, will be interesting to hear the sound demo.

But three of 'em, and in that big LP solid Mahogany body! It's gonna' be a beast

Well, we shall see!

Since we are on the topic of tone, a video you may find as interesting as I found it, is a tone test of 5 LPs: The Doug and Pat Show Chasing Oscar

The premise of the show revolves around the beloved “Oscar”. A ’58 LP with PAF pickups owned by Doug for close to 50 years. I wont spoil the video if you haven’t seen so won’t say more on it. However, after watching it I became interested in the history of the LP and found out that Dougie has himself a nice little nest egg in that all original “never touched – never to be touched” ’58!

Edit: Just watching another episode of the D&P show, I believe the '58 belongs to Pat not Doug.


This year the diet is definitely gonna stick!

# 13
William MG
Full Access
Joined: 03/08/19
Posts: 1,643
William MG
Full Access
Joined: 03/08/19
Posts: 1,643
06/29/2019 8:41 pm

Paint:

Well, a repaint is under way.

I sanded with 320, then 800, then buffed with polishing compound. Things were starting to show improvement. What you see here is before all that. I just finished taping.

I wiped the top with Naptha, allowed to dry, dry sanded with 320 and wiped down again with Naptha and when dry, began the repaint.

Looking for better results this time...


This year the diet is definitely gonna stick!

# 14
William MG
Full Access
Joined: 03/08/19
Posts: 1,643
William MG
Full Access
Joined: 03/08/19
Posts: 1,643
06/29/2019 11:29 pm

Paint:

So now at least I have a consistent "orange peel".


This year the diet is definitely gonna stick!

# 15
William MG
Full Access
Joined: 03/08/19
Posts: 1,643
William MG
Full Access
Joined: 03/08/19
Posts: 1,643
06/29/2019 11:30 pm

Paint:

And after my test this afternoon, I am more confident that I stand 1/2 a chance at improving the appearance.

You see the steps laid out in this pic...


This year the diet is definitely gonna stick!

# 16
William MG
Full Access
Joined: 03/08/19
Posts: 1,643
William MG
Full Access
Joined: 03/08/19
Posts: 1,643
07/16/2019 11:13 pm

Paint:

Finally back at this. I reconsidered flat black for the back and sides. The grain isn't anything special but neither is flat black.

As a compromise I decided the front of the head stock will be flat black, which ties it into the car, but the neck, back and sides will be natural.

I am using Tru Oil. This is my 1st coat. I have seen videos where up to 6 coats have been applied.


This year the diet is definitely gonna stick!

# 17
JeffS65
Registered User
Joined: 10/07/08
Posts: 1,602
JeffS65
Registered User
Joined: 10/07/08
Posts: 1,602
07/17/2019 2:56 pm

Look forward to seeing the pics. Sounds like a cool design. So much too learn but I can appreicate that you're just taking it on.

For the record, between you and a friend that is building his son a Jimmy Page-type Gibson EDS1275 double neck, I become inspired (if you will) to actively maintain my gear. Given the confluence of guitars (yes, I did buy the Tele last week) that I want to be able to set up my own gear. I've always been able to do minor changes but bringing in all my guitars to a shop make truss rod adjustments during season changes etc...Naw, I'll do it myself.

Thanks for kickin' me in to gear with my gear!

(...now I wait for all my luthier tools to come......)


# 18
William MG
Full Access
Joined: 03/08/19
Posts: 1,643
William MG
Full Access
Joined: 03/08/19
Posts: 1,643
07/17/2019 3:44 pm

Ahhh, very good Jeff. Good luck with it!


This year the diet is definitely gonna stick!

# 19
bookas58
Registered User
Joined: 10/28/12
Posts: 80
bookas58
Registered User
Joined: 10/28/12
Posts: 80
07/17/2019 10:08 pm

Welcome to a very addictive pastime . A little tip with the tru-oil . If you are looking to get a slick shiny finish , thin it down with mineral spirits or turpentine and apply more coats . A liitle bit goes a long way . On my last build Ithinned it down to 50/50 and put on about 30 coats . I was doing about 5 coats a day , granted , I live in a sub-tropical climate , so it dries a bit quicker . Another important point is to let it cure for 3 weeks to a month after your last coat before any sanding or buffing . It may be dry , but it has not fully hardened . I used micro mesh to wet sand it , letting the paper do the work , very little pressure . last step is buff it with scratch remover . Just remember this is a very thin finish , so avoid any temptation to get heavy handed . If you do screw up , acetone will remove it . Just don't do it in the wife's kitchen , Hope this helps


# 20

Please register with a free account to post on the forum.